Headstand

Headstand
Sirsasana

the 12 Basic asanas

Sirshasana - Headstand

Headstand: A powerful inverted posture that builds concentration, confidence, and vitality while giving the body and mind a fresh perspective.

Headstand (Sirsasana) is one of yoga’s most respected postures, often called the king of asanas. By reversing the usual effects of gravity, it gives the heart a rest, refreshes the mind, and brings renewed vitality to the whole body. Practiced with patience and proper alignment, it can improve concentration, build confidence, and develop steadiness in both body and mind.

Headstand is not about force. It is a posture of balance, breath, and awareness. With the right foundation and gradual progression, it becomes a powerful and transformative practice.

Contraindications

Do not practice Headstand if you have high blood pressure, glaucoma, a detached retina, a neck injury, or an infection affecting the head, ears, or sinuses. It should also be avoided during pregnancy and menstruation. If you have any medical concerns, seek professional advice before practicing.

Stop immediately if there is discomfort in the neck, pressure in the head, or any sense of strain.

Contents

Benefits of Sirshasana

Strengthens the respiratory and circulatory systems

Improves disorders of the eyes, ears, nose and throat; improves eyesight and hearing.

Relieves varicose veins

Relieves kidney problems and constipation

Relieves pressure on the lumbar and sacral areas of the lower back

Encourages deep exhalation, removing toxins from the lungs

Increases hair growth through increased circulation to the scalp

Stimulates the pineal and pituitary glands revitalizing the entire mind and body

Aligns the spine

Increases circulation to the brain, improving memory, concentration, and intellectual capacity

Counteracts nervous disorders and anxiety

Improves quality of sleep

Increases confidence

Video Inspiration – Headstand

Preparatory Exercise: The Dolphin

Dolphin is an excellent preparation for Headstand because it helps build strength in the shoulders and arms while teaching the forearm support needed for a steady inversion. It also helps you become more familiar with the action of lifting through the shoulders while maintaining a firm base.

Headstand for Beginners

Starting position

Child's Pose

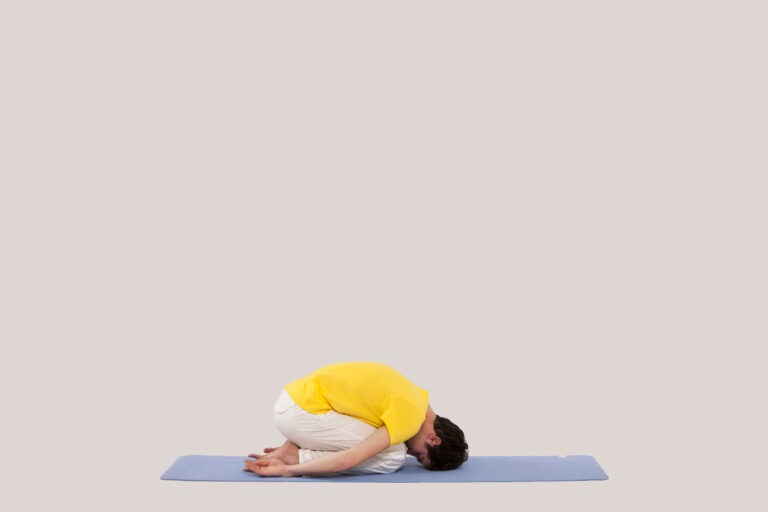
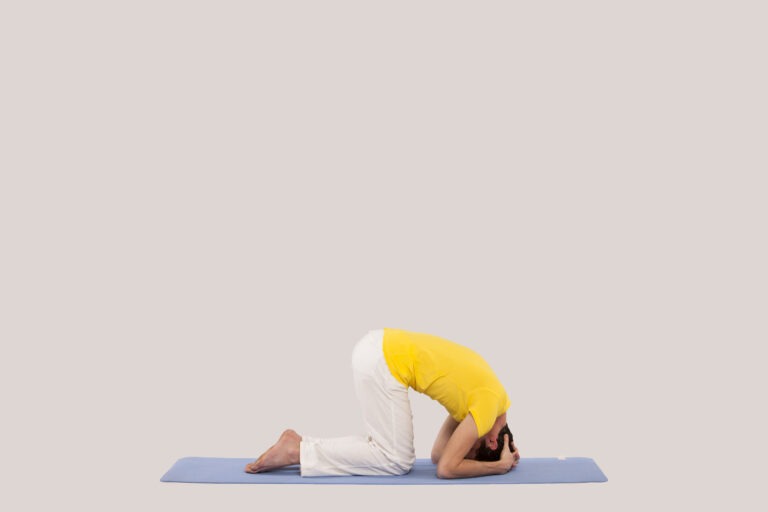
Relax in Child's Pose for a few moments before you practise Headstand.

  • Back and neck are relaxed

Clasp your elbows

Step 1 of Headstand

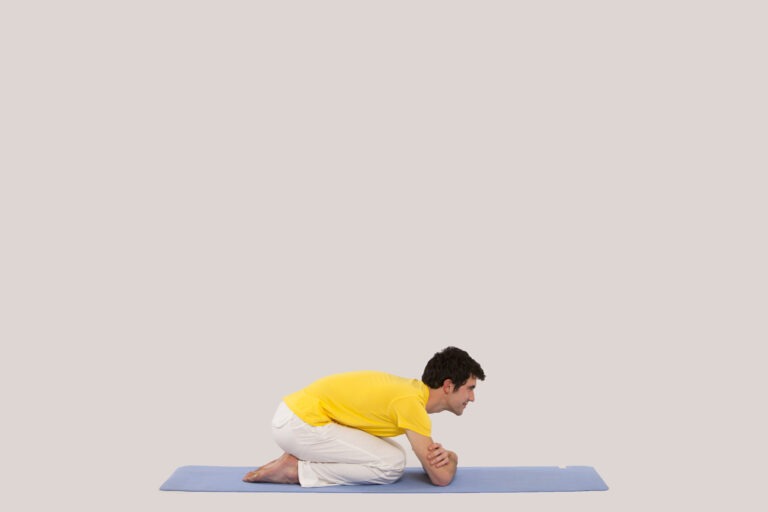
Lean forwards, clasping each hand around the opposite elbow and placing your arms about 20cm (8in) away from your knees on the floor in front of you.

  • Keep the buttocks on the heels

Interlock fingers

Step 2 of Headstand

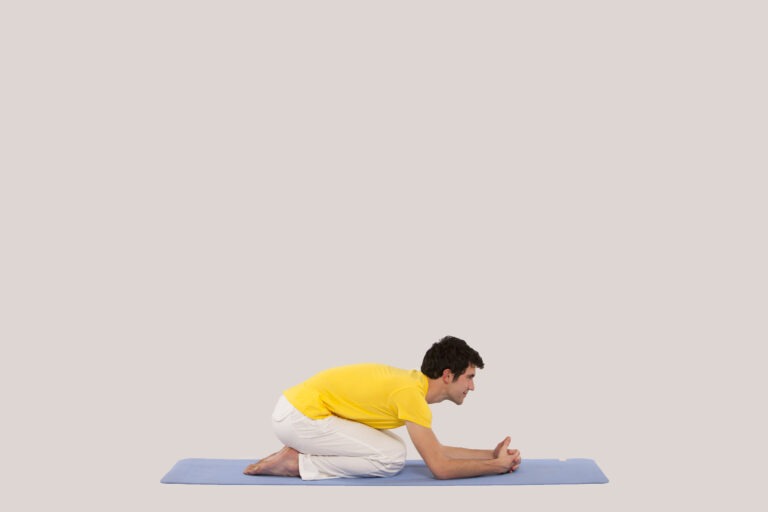
Without changing the position of your elbows, interlock your fingers, keeping your palms open. Your hands and elbows provide the firm tripod base for your Headstand.

  • Keep the buttocks on the heels

Place head on floor

Step 4 of Headstand

Bend over and place the topmost part of your head on the floor, firmly pressing the tripod of elbows and hands against the mat.

  • Keep the neck straight
  • Do not move the elbows

Lift knees

Step 4 of Headstand

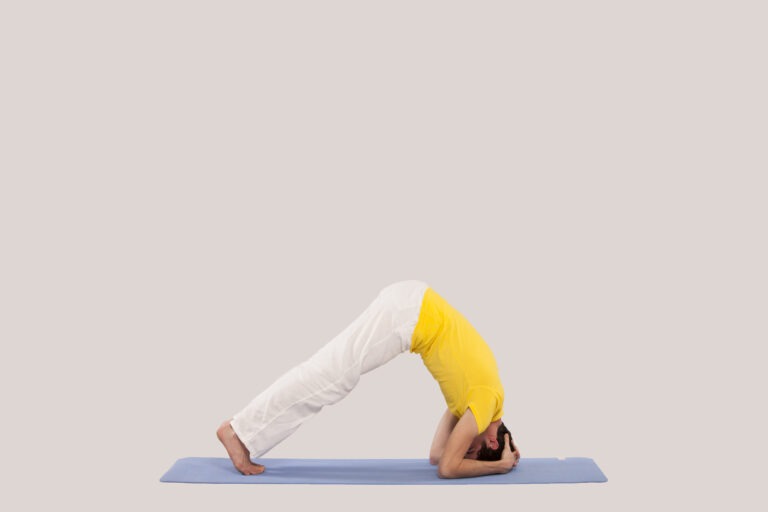
Lift your knees off the mat and push your hips up. Hold for a few rhythmical breaths, then return to Child's Pose.

If you are stiff in the legs or if your elbows start to lift off the floor, do not continue with Step 5, but instead practise Dolphin again and Single Leg Lift.

  • Keep the knees straight
  • Press the forearms and hands against the floor
  • Do not move the tripod of the elbows and hands

Headstand – Intermediate and Advanced

You should not practise Headstand against a wall. The secret of success in this pose is to focus on the tripod base formed by your elbows and hands, and on the point of balance in your lower back.

Walk toes towards head

Step 5 in Headstand

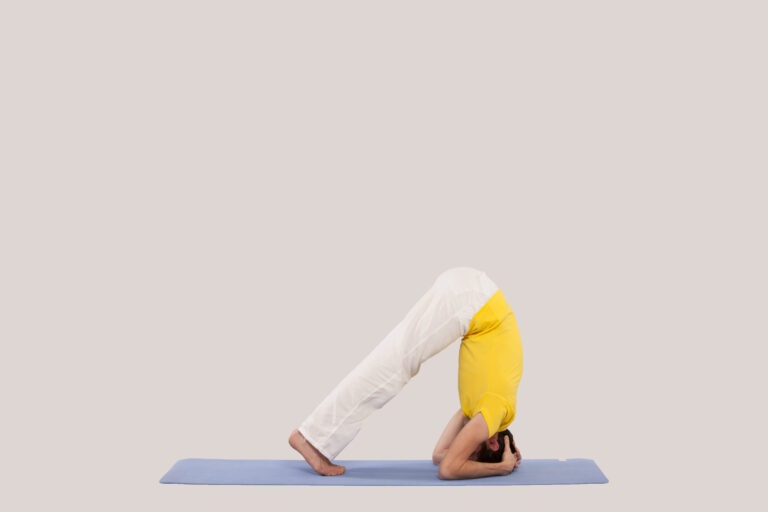
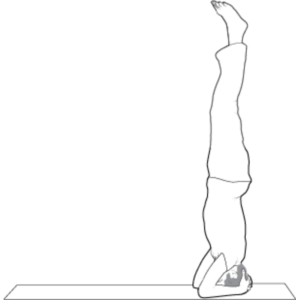
Starting from Headstand Step 4, and keeping your legs straight, walk your toes as close to your head as possible. Do not allow your back to collapse.

  • Keep the knees straight
  • Keep the feet together
  • Straighten the back as much as possible

Bend and pull legs up

Florian 4024

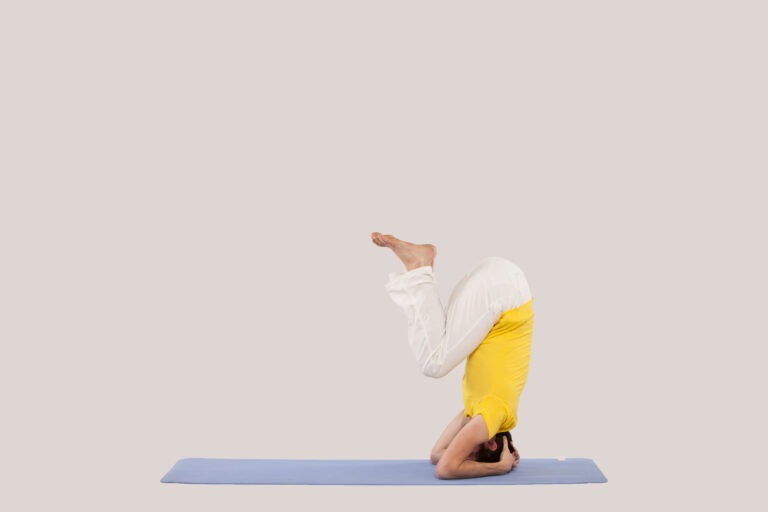
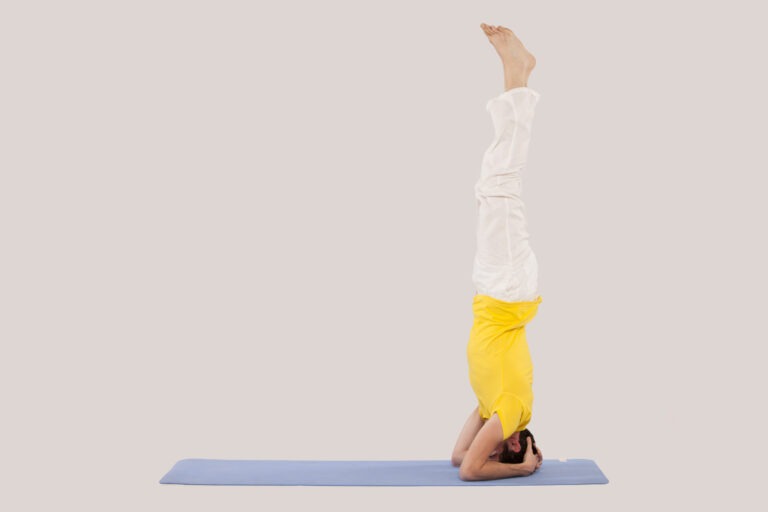
Breathing slowly and rhythmically, bend your legs and use your lower back muscles to pull your legs and pelvis up, until you are firmly balanced on your tripod base.

Occasional contraction of your abdominal muscles will prevent you from falling over.

  • Keep the knees together
  • Keep the feet relaxed
  • Keep the buttocks on the heels

Lift knees

Step 7 of Headstand

Continue to breathe rhythmically. Firmly press the tripod of elbows and hands against the floor. Focus on the point of balance in your lower back, then slowly start lifting your knees until your thighs are vertical and your feet are behind you.

  • Feel the point of balance in the lower back

Come into full pose

Step 8 of the Headstand
To come into the full pose, extend your knees and take your legs straight up. Avoid any tension in your legs and feet. Hold for 1–5 minutes, then come down by following Steps 7–1, in that order.
  • Keep the legs together.
  • Breathe rhythmically in the abdomen.
  • Keep the shoulders away from the ears

After the Pose

Rest in Child’s Pose for at least 6 deep breaths. Then lie down and relax fully in Corpse Pose for 1 minute.

This helps the breath, circulation, and nervous system settle after the inversion.

Important Guidance

Never force Headstand. Avoid jumping, kicking, or throwing the legs upward. The pose should be entered and exited slowly and with control.

Build the posture gradually. A steady Half Headstand is a strong foundation for the full pose. Practiced with patience and awareness, Headstand becomes not only an inversion, but a training in courage, concentration, and trust.

Recommended Reading

This site is registered on wpml.org as a development site. Switch to a production site key to remove this banner.